Hey there! If you want to update your phone number on Instagram, don’t worry, it’s a hassle-free process! In just a few simple steps, we’ll show you how to change your phone number on Instagram to add an extra layer of protection and keep your account information fresh and up to date. So, Let’s get started!
Related Read: How To Change Phone Number On TikTok?
Steps to Change Your Phone Number on Instagram
Step 1:
Open your Instagram app and tap the “Profile” icon at the bottom right corner. This will take you to your Instagram profile.
![]()
Step 2:
Tap on “Edit Profile.”

Step 3:
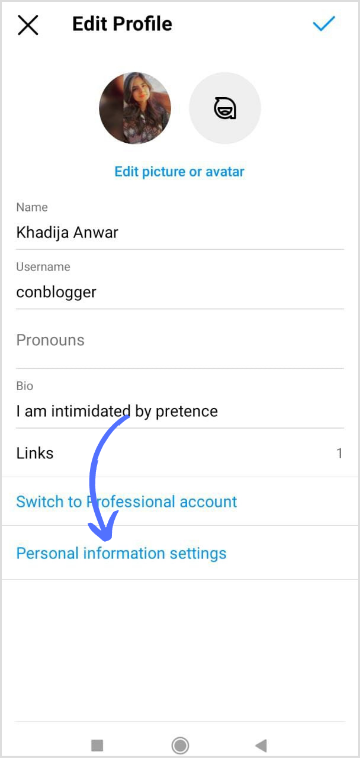
At the bottom, tap on “Personal Information Settings.”
Step 4:
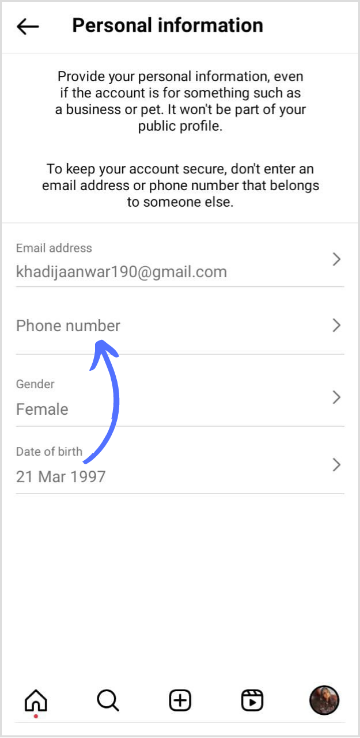
Locate and tap the “Phone Number” option on personal settings. You may need to enter your Instagram password again for security purposes.
Step 5:
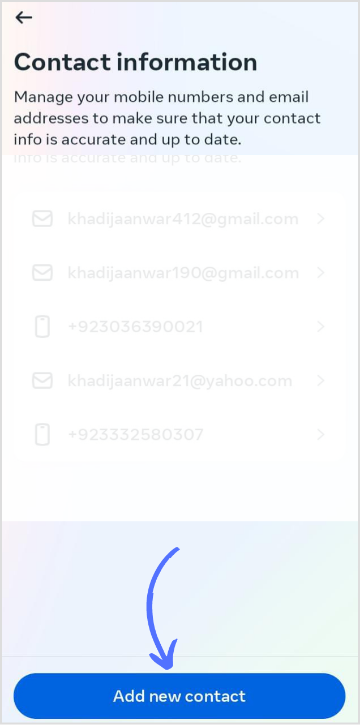
Here you can see your previous contact information. Tap on “Add New Contact” at the bottom.
Step 6:
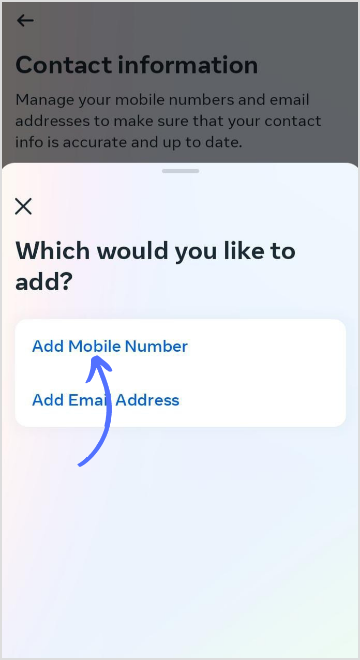
A sub-menu will appear; tap on “Add Mobile Number.”
Step 7:
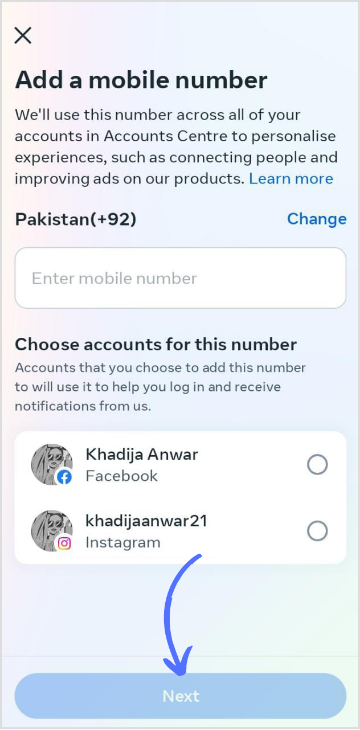
Enter your mobile number and ensure it is accurate and belongs to you. Double-check for any errors before proceeding. Tap on “Next” at the bottom.
Step 8:
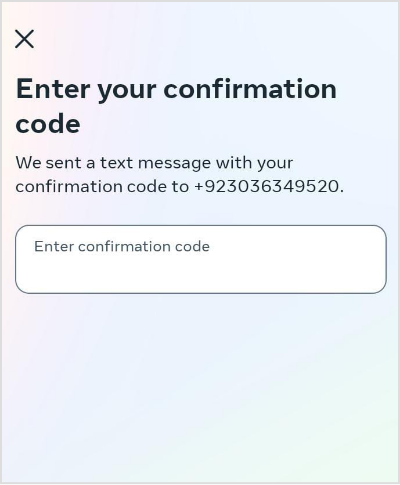
After entering the new phone number, Instagram will send a verification code to that number. Retrieve the code from your messages or call history, then enter it in the provided field within the app. The number will be updated successfully once you’ve entered the verification code correctly.
Remember, changing your phone number on Instagram helps keep your account secure and ensures you receive important notifications from the platform.
FAQs
How do I remove my phone number from Instagram?
Go to edit profile> Click Manage Contacts> Click Delete all> Click delete again to confirm.
How do I change my 2-step verification phone number?
Go to Instagram settings> Click Security> Click Two Factor Authentication> Change given phone number> Add confirmation code and click done.
