Have you had your fair share of wild adventures, unforgettable moments, and tons of photos, and do you want to share them with your fam and friends? You don’t need to be a photo editor to show off your special moments. Let’s talk about creating an album on Facebook. In this help center guide, we’ll show you how to create your own digital scrapbook and keep it intact as long as you have a Facebook account alive.
Also Read: How to Grow Your Facebook Business Page Organically in 2023
Facebook Marketing Manage and grow your brand on Facebook. Create, schedule, and publish posts, videos, and Reels to Facebook pages and groups.
Steps to Create an Album on Facebook
Here’s a straightforward guide on how to create an album on Facebook:
Steps 1:
Open your Facebook app. Once you’re on your Facebook homepage, tap on your “Profile” picture at the top to navigate to your profile.
![]()
Step 2:
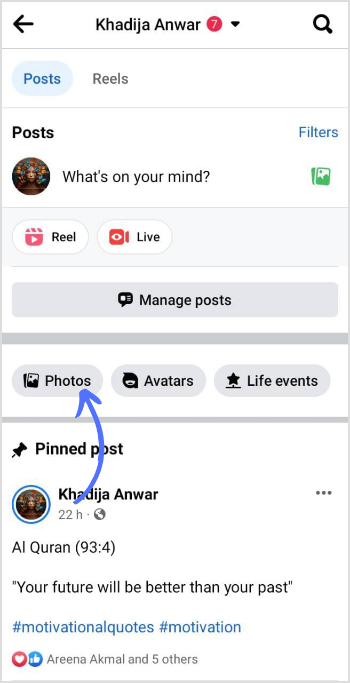
Scroll your profile page, tap the “Photos” tab just below “What’s on your mind?”
Step 3:
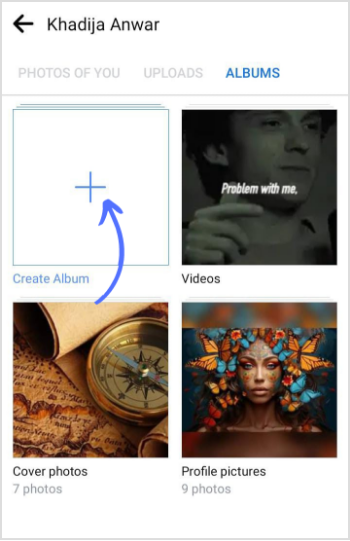
In the photos section, tap on “ALBUMS,” usually located just on the right of “Uploads.” Tap on the “Create Album.”
Step 4:
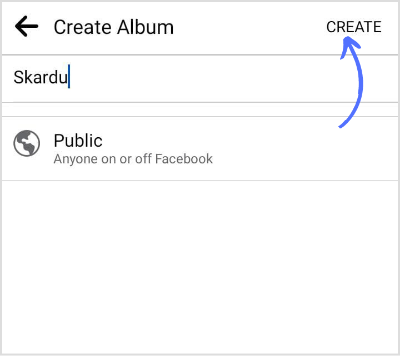
Name your album and tap “CREATE.”
Step 5:
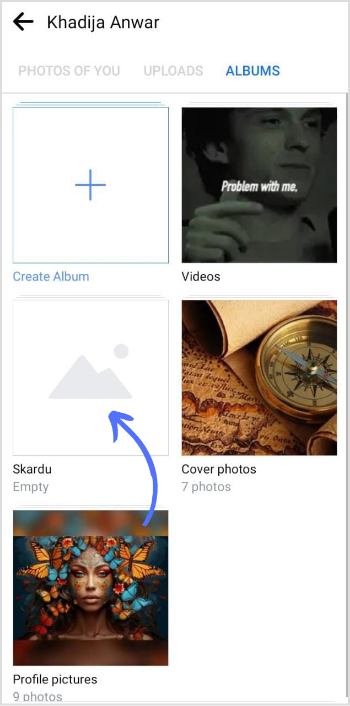
A new empty album is added in the photo section. Tap on your “Album Name” to add photos/videos.
Step 6:
A new page opens; tap “Add Photos/Videos.”
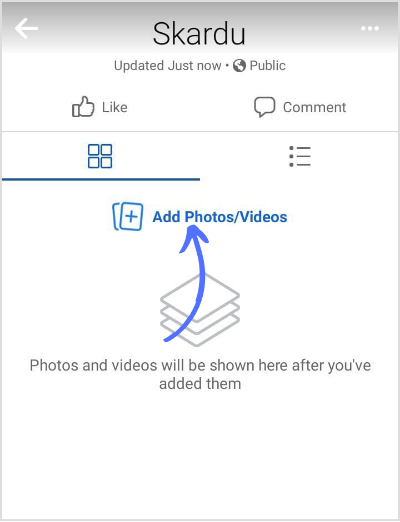
Step 7:
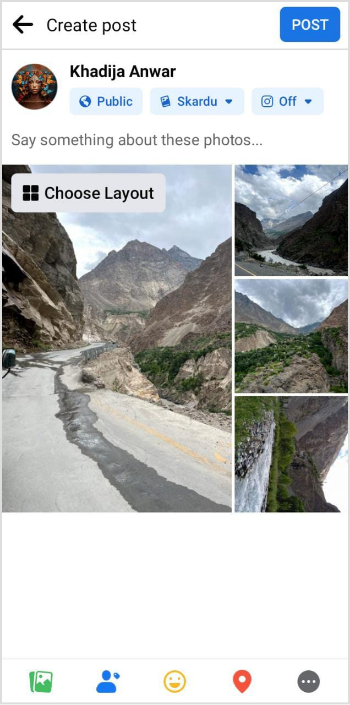
Upload pictures/videos from your gallery. If your photos feature friends, you can tag them by clicking on each photo and typing in their names. Drag and drop the photos within the album to rearrange them in your preferred order. Take a moment to review your album and make sure all the details, captions, and tags are accurate. Once you’re satisfied, tap the “POST” button.
And that’s it! You’ve successfully created an album on Facebook showcasing your favorite photos and memories for your friends and family to enjoy. Happy album creation!
FAQs
What is the difference between uploading photos and creating an album on Facebook?
Photo Albums offers Photo Posts with a title and a description. On the other hand, uploading photos is a feature with a description and without a title.
Can Facebook photos be moved to an album?
Locate the photo you wish to work with and give it a click. Afterward, hit the “Move to another album” option. Now, choose the album where you want the photo to reside, and click “Move photo.”
